Who should have thought astronomy could taste so good? Using everyone’s favourite cookie, the Oreo moon phases exercise is an enjoyable manner to teach children (and adults!) about the cycle of the moon. You can slip in a delicious science lesson while creating the moon’s eight phases by scraping, twisting, and arranging Oreo cream. We will address the most commonly asked queries, describe how to transform Oreos into a cosmic masterpiece, and discuss why this project is an excellent teaching tool here.
Table of Contents
Also Read: EBITDA Calculator: Take Control of Your Finances
What Are the Oreo Moon Phases?
The moon changes from a New Moon to a Full Moon and back again during its eight-phase cycle round the Earth. The moon’s surface, which we view from different angles during the month, reflects sunlight, creating these phases. You can use Oreos to represent each phase by cutting the cream filling into shapes which reflect the parts of the moon that are illuminated. It’s an easy and entertaining method for showing a difficult astronomy idea.
The snack’s scientific foundation
A moon reflects sunlight instead of creating light on its own. Phases are created by the moon rotates around the earth, changing the area of its bright side that is visible from Earth. A 2D model of the event is provided by Oreos. Explain how gravity maintains the moon’s orbit or investigate why we always see the same side of the moon (internally lock rotation) for an additional look.
Step-by-Step Guide to Making Oreo Moon Phases
Ingredients:
- 8 double-stuffed Oreos (or what flavour you choose).
- A paper plate or dark-coloured cardboard (any colour can do, but dark colours are better for showing space)
- A scraping tool, like a toy blade, toothpick, or butter knife
- A printed moon phase diagram (pick one for guidance if needed)
- Markers or labels of your choice additional items like glitter, star stickers, or delicious decorations
Instructions
1. Set Up Your Work Area
Spread out your paper or plate. Write the eight steps in order if you’re using labels:
- The New Moon
- Waxing Crescent
- First Quarter
- Waxing Gibbous
- The Full Moon
- Third Quarter (Last Quarter)
- Waning Crescent
- Waning Gibbous
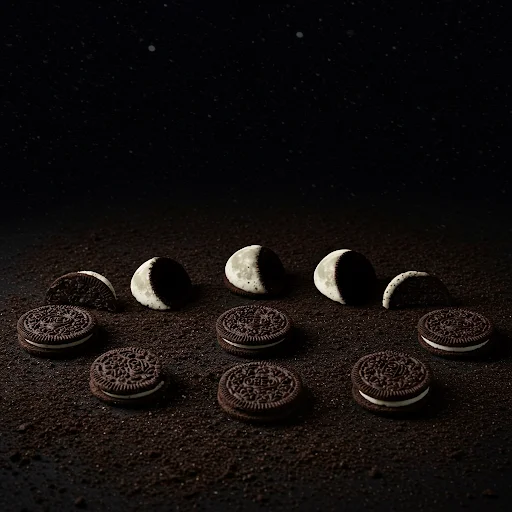
2. Twist carefully
Keep the cream on one side of each Oreo untouched and carefully separate them. Shape the cream into the right shapes for each step using a knife or toothpick:
- Take off all cream (totally dark) on the new moon.
- A small piece must stay on the right after completing the moon.
- In the first quarter, cut the cookie in half (right side).
- Waxing Gibbous: Almost complete, with the left side missing a small portion.
- Full Moon: Do not remove any cream.
- Waning Gibbous: Waxing Gibbous mirror (right side without slice).
- In the third quarter, cut the cookie in half (left side).
- Small pieces on the left shows the waning crescent.
3. Arrange and label
To look like the cycle of the moon, arrange the Oreos in a circle. Name each step using labels or markers.
Pro Tips:
- For younger children: Before teaching all eight, compress to four main phases: New, First Quarter, Full, and Third Quarter.
- For older children: As they shape ask them to explain why the phases happen.
- Make It Artistic: Add star stickers, draw stars, or use blue frosting to recreate the Earth in the centre.
- Take a Picture: Take a photo to post online with #OreoMoonPhases before eating your project!
The Reason This Activity Is Effective
1. Edible Activity
Using multiple senses increases the chances that children will remember information. Simple concepts are made into unforgettable memories by the taste of twisting Oreos and the flavour of chocolate and cream.
2. Visual and kinaesthetic learning
Students can physically “see” how sunlight hits different moon regions by shaping the cream. Combine this with an example using a torch: To resemble the relationship between the sun, moon, and earth, shine a light on a ball in a room that is completely dark
3. Flexibility in the Home School and Classroom
STEM Evenings:
This is a crowd-pleasing and affordable school event activity.
These are educational links: Combine with a math exercise (calculating the 29.5-day period of the astronomical cycle) or a creative writing prompt (“A Day on the Moon”).
Fosters Curiosity
After learning the basic concepts, children commonly ask questions like, “What is a solar surpass?” or “Why does the moon look orange sometimes? creating chances for more deep space travel.
Final Tips for Success
Adult Supervision: Youngsters may want guidance when scrapping. Convert errors into opportunities for learning (“Oops! Let’s discuss why the moon isn’t really made from cream.
Connect to Real Life: Relate phases to holidays (for example, a Full Moon Halloween) or night animal behaviour.
Make It a Game: Set a timer to see who can arrange phases the fastest, or hold a “moon knowledge” quiz with Oreo awards.
Conclusion
The Oreo moon phases activity is more than simply a tasty project; it inspires curiosity about space. This food experiment creates a fun and memorable learning experience for educators, parents, and space fans all. One cookie at a time, you will inspire the future generation of astronomers by combining science and art.
Want anything more? Extend the pleasure with:
A telescope sky experience is a great way to increase the enjoyment.
A documentary such as The The most: Voyager in Space or Apollo 11.
Making moon-shaped cookies for a class that
FAQ
Q: How many Oreos should I get?
A: We need a total of 8 cookies—one for each phase. Be ready with some more for breakage or snacking.
Q: What if an Oreo breaks?
A: Put the broken ones aside for the New Moon or eat them as a snack! You can also place broken parts at the bottom of your moon phases set to get a more neat appearance.
Q: Is it fine if I go with other cookies?
A. Yes, definitely! Experiment with gluten-free or vegan brands. Also, in terms of non-edible materials, you can use cardstock, paint, or even playdough.
Q: How can I make less of a mess?
A: A butter knife will help you to do the job better, so use it for smoother scraping. Place parchment paper for easier clean-up.
Q: What about allergy-friendly choices?
- Gluten-Free: Glutino, K-Toos.
- Dairy-Free: Trader Joe’s Joe-Joe’s.
- Non-Food: Craft foam, clay.